Friday, March 13, 2009

Fifty Free Grunge Brushes

While looking for some brushes for a project I'm working on, I came across a site called brusheezy.com where KeReNR has fifty (50) free grunge brushes for download. So if you are using Photoshop or Elements, this is a nice set of free brushes for your grunge work.

Download Page for 50 Free Grunge Brushes


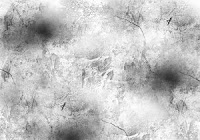
While testing to see if the brush set was working, in less than a minute I made this simple grunge background.

Thursday, March 12, 2009

Turn Your Handwriting into a Personal Font


There is a website that will convert your own handwriting into a font. So instead of choosing Arial or Helvetica for that next document, use your own handwriting!

The site will take a scanned sample of your handwriting and change it into a handwriting font that you can use with your word processor or graphics program.

Some other uses for the font advertised on the site are:
  • Add a personal touch to your letters and documents
  • Use your handwriting for scrapbooking or journaling.
  • Keep a permanent record of your children's handwriting.

In my photography work, this would be useful to add a signature to images for a personal touch or as a watermark or copyright stamp.

If you think this is something that might be useful, you can buy your own handwriting font for $9.00 on Fontifier. com.

Patricia


Wednesday, March 4, 2009

Copyright Stamp Custom Brush

After a recent photo shoot, I needed to add my copyright stamp to each image. There were approximately 45 images so I needed a quick way to add the stamp to each one. I created a custom brush and then one simple click added the copyright stamp to each image.
I always recommend printing these instructions so that you can have them next to the keyboard. It makes it easier to follow along.
Instructions Using Photoshop

  • Open a new blank screen with a transparent background.
  • Click "D" to set the foreground color to black
  • Click on the Type Tool (or press "T")
  • Choose an appropriate Font with a large sizeI made mine fairly large, almost covering the background horizontally.
  • Add the copyright symbol ©The copyright symbol is made by holding down the Alt key and typing 0169 [Alt + 0169].
  • Type your name or company name right after the copyright symbol.©Bucks Mountain Galleries
  • Click on the Brush Tool (or press "B")
  • In the top menu, click on "Edit" and choose "Define Brush"
  • In the dialog box, name your brush, and click "OK".
  • Now the brush is saved in your Brush Presents and available at any point in the future
That's it. You have just created a custom brush for your custom copyright stamp. Now let's put it to use!

How to Use the Brush
  • Open an image.
  • Click on the Brush Tool (B)
  • Scroll to the bottom and find the custom brush you just created.
  • Place your cursor on the image where you want the copyright stamp to appear.
  • Click once. You should see your stamp on the image.
  • If you don't like the placement, press Ctrl-Z (Undo) and start over.
  • If you need to place the stamp on a dark background, then press "D" to change the foreground color to white. Click once in the dark area and your custom stamp should appear in white.

Sunday, March 1, 2009

Free Image Collage Software


Shape Collage 2.1 is a great little image collage program that is fun to use.

The program is free for personal use. However, if you are planning to sell an image collage using the program, you must make a
donation. That's what I did.


Download it now!

The computer saavy will have no trouble using this program but if you aren't used to working in collage programs, here are some simple instructions that you can print out to follow when using the program:

- In top menu bar, select File, then Add Photos
- Using the pop-out dialog box, browse to a location on your computer to select multiple images

- In the far left column of the program screen, use the + Plus or Minus signs at the bottom to add or delete more images

- In the far right column, choose preset shapes or select a letter from the alphabet. You can also draw your own shape.
-You can also adjust collage/photo size, number of photos and photo spacing.

- When you are finished making adjustment, go to the center column and press the Preview button to make sure you are happy with the arrangement.
- When you are ready, press the Create button and save the collage to a location on your computer.

Shape Collage 2.1

-Patricia Montgomery
Bucks Mountain Galleries