
Sunday, May 31, 2009
Photographing Rocks

Friday, March 13, 2009
Fifty Free Grunge Brushes
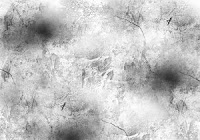 While looking for some brushes for a project I'm working on, I came across a site called brusheezy.com where KeReNR has fifty (50) free grunge brushes for download. So if you are using Photoshop or Elements, this is a nice set of free brushes for your grunge work.
Download Page for 50 Free Grunge Brushes
While testing to see if the brush set was working, in less than a minute I made this simple grunge background.
Thursday, March 12, 2009
Turn Your Handwriting into a Personal Font
- Add a personal touch to your letters and documents
- Use your handwriting for scrapbooking or journaling.
- Keep a permanent record of your children's handwriting.
In my photography work, this would be useful to add a signature to images for a personal touch or as a watermark or copyright stamp.
If you think this is something that might be useful, you can buy your own handwriting font for $9.00 on Fontifier. com.
Wednesday, March 4, 2009
Copyright Stamp Custom Brush
I always recommend printing these instructions so that you can have them next to the keyboard. It makes it easier to follow along.
Instructions Using Photoshop
- Open a new blank screen with a transparent background.
- Click "D" to set the foreground color to black
- Click on the Type Tool (or press "T")
- Choose an appropriate Font with a large sizeI made mine fairly large, almost covering the background horizontally.
- Add the copyright symbol ©The copyright symbol is made by holding down the Alt key and typing 0169 [Alt + 0169].
- Type your name or company name right after the copyright symbol.©Bucks Mountain Galleries
- Click on the Brush Tool (or press "B")
- In the top menu, click on "Edit" and choose "Define Brush"
- In the dialog box, name your brush, and click "OK".
- Now the brush is saved in your Brush Presents and available at any point in the future
How to Use the Brush
- Open an image.
- Click on the Brush Tool (B)
- Scroll to the bottom and find the custom brush you just created.
- Place your cursor on the image where you want the copyright stamp to appear.
- Click once. You should see your stamp on the image.
- If you don't like the placement, press Ctrl-Z (Undo) and start over.
- If you need to place the stamp on a dark background, then press "D" to change the foreground color to white. Click once in the dark area and your custom stamp should appear in white.
Sunday, March 1, 2009
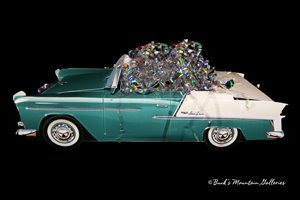
Free Image Collage Software
The program is free for personal use. However, if you are planning to sell an image collage using the program, you must make a donation. That's what I did.

Download it now!
The computer saavy will have no trouble using this program but if you aren't used to working in collage programs, here are some simple instructions that you can print out to follow when using the program:
- In top menu bar, select File, then Add Photos
- Using the pop-out dialog box, browse to a location on your computer to select multiple images
- In the far left column of the program screen, use the + Plus or – Minus signs at the bottom to add or delete more images
- In the far right column, choose preset shapes or select a letter from the alphabet. You can also draw your own shape.
-You can also adjust collage/photo size, number of photos and photo spacing.
- When you are finished making adjustment, go to the center column and press the Preview button to make sure you are happy with the arrangement.
- When you are ready, press the Create button and save the collage to a location on your computer.
Shape Collage 2.1
-Patricia Montgomery
Bucks Mountain Galleries
Thursday, February 26, 2009
Journey into the World of Digital Infrared
 In early 2008 I impulsively bought an infrared R72 filter for my Canon 30D digital camera, screwed the filter on the lens, and started shooting. Each and every one of the resulting images were black. Solid black! When the infrared R72 filter did not work, I was shocked and couldn’t figure out what was going on.
It was now time to research the art of infrared photography, something I should have done before I made the filter purchase! Browsing online sites and reading books on the subject, I found that the newer digital cameras, like mine, have a built-in infrared blocking filter that would not let in the infrared light!
However, these internal filters are not entirely foolproof and a bit of infrared light does leak through. So with the R72 filter over the lens, one can capture these escaping wavelengths. But the long, long exposure time does require a tripod and shutter release cable using the bulb feature. This took all the fun out of shooting infrared.
Soon I was on a mission to find an older digital camera, made before internal infrared blocking filters became standard in digital cameras. The Minolta Dimage7 came out in 2001 and at 5 megapixels, it was touted to have numerous advanced features that up until that time had only been found on professional cameras. But fast forward seven years to 2008 and it was no longer the highest megapixel camera on the market. However, in my situation it was the most economical option for use of the infrared R72 filter.
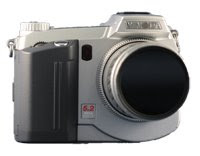 I waited in anticipation for the Minolta Dimage to arrive and soon realized that one stumbling block was still firmly in place. With the R72 filter attached, the scene in the viewfinder was still very dark. So dark that often the Minolta could not find an automatic focusing point. And with my aging eyesight, I could not manually focus either. A major drawback was that I had to remove the filter to compose the shot and then replace the filter very carefully to take the shot.
 Lost in a viewfinder that was too dark, it became a hit-or-a-miss situation where I did not know what I had just shot until the images were downloaded to my computer. It probably would not have been a problem for the young photographer's eyes, but it was definitely an issue for mine.
Totally addicted to infrared despite the halting starts and stops, I knew my journey into infrared had only begun. More research revealed that there are companies, such as LifePixel, that will convert a newer digital camera to infrared. An expensive procedure, it also results in a camera that is solely an infrared camera and no longer shoots normal digital images. Consequently, this is not something one would get done to to their main digital camera. An infrared-converted camera should be a second camera unless, of course, the photographer only shoots in infrared.
 Since I did not have a spare camera for the conversion, I began to search online. The cost of a good used digital camera combined with the cost of the infrared conversion was outside my budget. With persistent searching over the course of several months, I finally found one for a reasonable price that had already been converted. Gripping a used Canon 20D camera that already had the infrared conversion, I gazed through the viewfinder. It was awesome! The scene was in sharp, bright living color! Composing the shot was now easy. Focusing the shot was a no-brainer for the auto-focus mechanism and very easy for me in the manual mode. See the scene, shoot in infrared!
 The resulting images in the LCD monitor, however, are not color. They have a strong red hue and look nothing like those surreal black and white photos one usually sees. Infrared usually will also need post processing work using an image editing program, such as Photoshop, to achieve optimum results.

 There is the option of setting a custom white balance in the camera menu by taking a shot of green grass or leaves and then using this setting as the custom white balance. This will result in less red and more mid-tones and whites. My own editing choice is to skip setting a custom white balance and open the dark red image in Photoshop. It challenges my creativity to work on the image and watch it slowly morph into something otherwordly. My favorite subject is a landscape that is transformed from blue skies to deep black skies and the green landscape has exploded into bright white foliage.
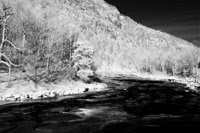 Shooting infrared has opened up limitless possibilities in my own creative love affair with photography. I carry both cameras on all shoots and often take the same shot with both of them. Excitement always builds at the end of the day as the computer screen reveals the results.
My journey though the world of infrared migrates from living color to red to the otherwordly. I have only just begun and there is exciting anticipation of what can be brought to light in the surreal world of red!
-Patricia Montgomery
Friday, February 13, 2009
Friends are...
Edna Buchanan said, Friends are the family you choose for yourself.
Some friends are with us from the moment we meet them until the end. Yet others pass through for only a season. Whether short or long, the time we spend with friends is a bonus in life!
Hang on!

Franklin D. Roosevelt once said, When you reach the end of your rope, tie a knot in it and hang on.
If we remain childlike, that rope with the knot can become a thing of joy. While you are hanging on, Swing!

